For the letters, I bought a cotton print and sturdy white background material from Jo-Ann Fabrics.
I found this crew neck at Walmart for pretty cheap and they have lots of different colors to choose from!
To start, print out the letters you want from your computer and cut them out.
Flip the letters over and trace them onto the back side of your desired interior fabric (the fabric that will be on the inside of the letter) with a marker or washable fabric pen. Cut out the letters using fabric scissors.
Take your cut out letters and put them right side up on the white material. Pin the letter to the material.
The white material can be any sturdy, stiff fabric that you find at your local fabric store. It doesn't even have to be white, you can choose whatever outline color you like!
Cut around the letter leaving a white border as thick as you like. I eye-balled the width of my border, but you can use a ruler and trace it out to make it exact.
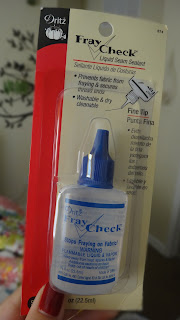
Even though we are sewing the letter onto the sweatshirt, I wanted to make sure that the edges of the letters didn't fray at all. To prevent fraying, go around the edge of the letters with Fray Check, which can be bought at Jo-Anns.
Using a zig-zag stitch, sew the interior fabric to the white base material.
It should look like this after sewing it to the white.
After you have completed sewing your interior fabric to the base material, pin the letters to the sweatshirt in the position that you like. I tried my sweatshirt on and pinned the letters to the sweatshirt while I had it on to make sure I liked the placement.
Using the same zig-zag stitch, sew the letters to the sweatshirt.
TA DA! Your personalized sweatshirt is complete!
I have a feeling I will be making more of these...I'm thinking a FSU one would be super cute in garnet and gold fabric. ;)
- Lauren


